الاثنين، 24 يناير 2011

BSNES on Older Distros, such as Lucid and Squeeze

In addition to being on the forefront of SNES emulation, BSNES also utilizes cutting-edge programming techniques to maintain the cleanest, most easily readable code possible. Unfortunately, that means that older distros--even ones that are still well within their supported lifespan--may get left out in the cold.

However, BSNES forums user Themaister has done us all a favor and backported byuu's cutting-edge C++0x code to use the more widely supported C++98 standard, which allows it to be compiled on any version of GCC from 3.x on up. The only catch is that his work only applies to libsnes, the modular emulation core of BSNES in library form, so byuu's official Phoenix GUI is still off limits, as is his libsnes-driven Qt GUI.

Thankfully, Themaister has us covered here, too, by offering SSNES, his super-slim CLI-only interface to libsnes. Just like his C++98 port of libsnes, SSNES can be readily compiled with even extremely old versions of GCC, so any semi-modern distro should be able to use it just fine.

My PPA now contains Lucid packages for both libsnes (all three official cores, plus an snes9x-based core for legacy machines) and SSNES, which should also (hopefully) work on Debian Squeeze.

A few things I'd like to point out about SSNES:
1. It will accept a variety of audio drivers, including jack, which allows ultra-low latency :D
2. My package was built using dynamic libsnes linking, so it requires a libsnes package from my PPA to function
3. In addition to accepting BSNES-style XML shaders written in GLSL, SSNES will also accept shaders written in Nvidia's Cg language if you install the nvidia-cg-toolkit package
4. The default configuration file for SSNES is located at /etc/ssnes.cfg, but you can override this by placing another config file in ~/.config/ssnes

As always, let me know if you run into any problems with these packages.

الخميس، 20 يناير 2011

Crimson Echoes and Flames of Eternity

These two ROMhacks for the legendary SNES RPG Chrono Trigger were just leaked on Reddit the other day and I happened across some bsnes-compatible UPS patches, which you can download here. (I didn't make these patches, btw, and I didn't upload them)

I haven't played through them yet, but they seem to work fine from what I've seen. They will get past the initial intro sequence and into the playable game, but I haven't tested any further than that.

They were tested with an unheadered Chrono Trigger ROM that had been run through snespurify.

I'll update this post with anything interesting I find in my playthrough.

السبت، 15 يناير 2011

Setting Up Pbuilder To Act Like Launchpad Build Farm

I build a lot of packages for my Launchpad PPA and I use a number of different systems to do it, so I find myself needing to set up pbuilder environments to test my build procedures pretty often. Unfortunately, documentation for this procedure is often out of date and/or goes into a lot of strange details and edge-cases that are unrelated to me, so I decided to write down my steps for future reference.

Here's what I do:
1. Install pbuilder and some other handy packages
Open up a terminal and type:
sudo aptitude install pbuilder debhelper devscripts build-essential
2. Tell the pbuilder environment that it is going to act just like the Launchpad build farm
Still in our terminal:
sudo pbuilder create --debootstrapopts --variant=buildd
This one takes a while because it's basically installing an entire system inside your existing installation, so grab a cup of coffee and watch the messages fly by.

3. Give it access to all official Ubuntu repositories
By default, your shiny new pbuilder environment won't have access to a lot of packages, so we'll want to add mirrors for common Ubuntu packages, as well as our own PPA to the pbuilder configuration file. So, still in a terminal, type:
nano ~/.pbuilderrc
and paste in:
OTHERMIRROR="deb http://archive.ubuntu.com/ubuntu [YOUR UBUNTU VERSION] main restricted universe multiverse | deb http://archive.ubuntu.com/ubuntu [YOUR UBUNTU VERSION]-backports main restricted universe multiverse | deb http://archive.ubuntu.com/ubuntu [YOUR UBUNTU VERSION]-security main restricted universe multiverse | deb http://archive.ubuntu.com/ubuntu [YOUR UBUNTU VERSION]-updates main restricted universe multiverse"
and we'll also pipe on a section for our PPA, so we can use our own packages as dependencies, which in my case looks like this:
| deb http://ppa.launchpad.net/hunter-kaller/ppa/ubuntu maverick main
4. Make our pbuilder trust packages from our PPA
First, we'll login to our pbuilder environment:
sudo pbuilder --login --save-after-login
Then, we'll give it the public key to our PPA, just like if we were adding it to our own keyring:
apt-key adv --keyserver keyserver.ubuntu.com --recv-keys [YOUR PUBLIC KEY HERE]
If all goes well, you can leave your pbuilder environment by typing:
exit
5. Update our environment with these new packages
Still in our terminal, type:
sudo pbuilder --update --override-config
This should get you in pretty good shape. Let me know if you run into any issues.

الثلاثاء، 11 يناير 2011

Bloom Pixel Shader for bsnes

I did some digging around online and came across some bloom filters written in GLSL. The one on this site looked the best to my eyes, so I converted it to work with bsnes and tweaked the settings a bit to achieve the desired effects.

What I found while playing around with it is:
1. Turning on 'Smooth video' seems to amplify the bloom effect.
2. The same amount of bloom looks different on each game, depending on the overall dark/light-ness of the game.
3. Combining excessive bloom with bsnes' scanline filters can make a pretty decent approximation of a CRT. While this is in no way as accurate or as nice looking as cgwg's CRT shaders, it may be an option for the many people whose video cards don't have enough horsepower to handle that complex shader.

First, I made a simple, fairly subtle (as far as bloom is concerned...) shader, which looks like this:
Looks pretty nice, eh? Unfortunately, the exact same shader settings look awful in Super Mario World:
One big flare-out... All I need is some brown and lens flare and I'll have next-gen graphics.

However, if you add in a scanline filter, things can really get evened out. In fact, you can use the different scanline intensity filters on a game-to-game basis to attenuate the inconsistency of the bloom effect. For example, here's a shot of Super Mario World with even more bloom added and 'smooth video' checked, but with 100% scanlines to chill things out a bit:
As you can see, it kinda gives it a plasticy, oversaturated look, but it's sort of charming, if you ask me.

In contrast, those exact same settings in Chrono Trigger--an altogether darker game--produce a really nice CRT-style effect, like this:
As you can see, even the bright parts don't suffer from excessive flare-out and the color bleed into the scanlines from the bloom provides an effect that is reminiscent of the phosphor glow on a CRT display.

One more shot of Chrono Trigger, this time using heavy bloom, 25% scanlines and smooth video:
I have asked WhateverMan if he would release his shader code under a permissive license. If he does, I will post my simplebloom and heavybloom versions here for download.
Update (1/19/11): WhateverMan was nice enough to allow his work to be distributed/modified under the GPL, so you can download the heavybloom shader here and the simplebloom shader here.

Update (2/2/11):
I also made a simple scanline shader that works with or without video smoothing:
For best results, use it along with a scale factor of 4x. Otherwise, the pixels won't line up with the scanlines correctly.

UPDATE (2/28/11): I made a scanline shader that works with a 3x scale factor, as well. You can download it (and the other GLSL shaders) here.

السبت، 1 يناير 2011

Added NEStopia to my Ubuntu PPA

I added packages for the latest Linux port of the awesome NES emulator NEStopia to my PPA. The only problem is that I don't know how to make a package create a ~/.[appname] config directory and/or put required config files into that directory at first run. If anyone knows how to do that, I'd appreciate the info. EDIT: Ok, I fixed it. I created a quick-and-dirty bash launcher script that will check for the required directory and file and create them if needed.

NO LONGER NECESSARY:
Unless/until I find out how to do that, anyone wanting to use my package will have to manually create the config directory and at least create a husk of an inputs file by opening a terminal and typing:
mkdir .nestopia ; touch .nestopia/nstcontrols
From that point on, everything should work fine. If you are super-scared of hitting the terminal and would feel better with a script, you can download and run this script and it will take care of it for you.

Let me know if you run into any issues or have any questions.

الثلاثاء، 28 ديسمبر 2010

CRT Pixel Shader Filter for SNES Emulation

Update 05/18/2011: More screenshots for more new filters in my new post. :-)

Update 05/02/11
: After many changes, it looks like the CRT shader development has settled down, so there's less need for me to maintain the older versions of the shaders. From here on out, I recommend visiting Screwtape's git repo for all of your XML shader needs (my mediafire account will still be there, but Screwtape has all of mine and more).

CRT.OpenGL.shader and CRT-flat.OpenGL.shader are similar to the shader covered in this post, though they run slightly faster and have no visible artifacts. CRT-simple.OpenGL.shader is a simplified rewrite that should be usable on much older, slower machines.

Here is the original post for informational purposes:
This post covers the use of filters to upscale pixel art--specifically as it applies to SNES emulation--with special attention to CRT reproduction. If you just want the pictures and to download the filters, skip to the bottom of the post.

Background:

As everyone who dabbles in old-school emulation knows, artwork that was intended for a 480i CRT television that has been upscaled to an HD resolution looks like absolute garbage on an LCD monitor. The chunky sprites with their often thick, cartoony outlines just weren't designed to be reproduced with sharp edges resulting from nearest-neighbor upscaling.

To get around this ugly upscaling effect, many emulators now include upscaling interpolation filters, which apply complex mathematical algorithms to the original picture to fill in the gaps between things that are impossible to represent in chunky low-res, such as curves and smooth diagonal lines. You're probably familiar with some of the more common and popular interpolating filters, such as SuperEagle, SuperSaI and HQ2x. Unfortunately, none of these filters gets everything quite right, especially numbers and letters, which can look bubbly or overly smoothed (you can learn more about pixel art scaling algorithms here).

Purists have long been turned off by the inaccuracies of interpolating filters and have instead used scanline masks to try and capture the effect of an interlaced display, relying on the human brain's natural ability to recognize patterns and fill in the gaps between lines (you can learn everything you ever wanted to know about scanlines here). However, this too falls short from a true representation of a CRT display, as it ignores the existence of phosphors--the tiny red-, green- and blue-colored lenses that the electron gun in the back of a CRT tube shoots with a beam of electrons to recreate a colored pixel--and the color bleed that naturally occurs in these displays.

Recently, a number of determined individuals have set out to try and capture all of the different effects of a CRT display, warts and all, to truly reproduce classic pixel art the way it was meant to be viewed.

The Comparisons:
(Each of these images is presented as it would be displayed onscreen, at a resolution of approximately 800x600, then again at 400% scale without any interpolation used when scaling; as always, click the thumbnail to embiggen)

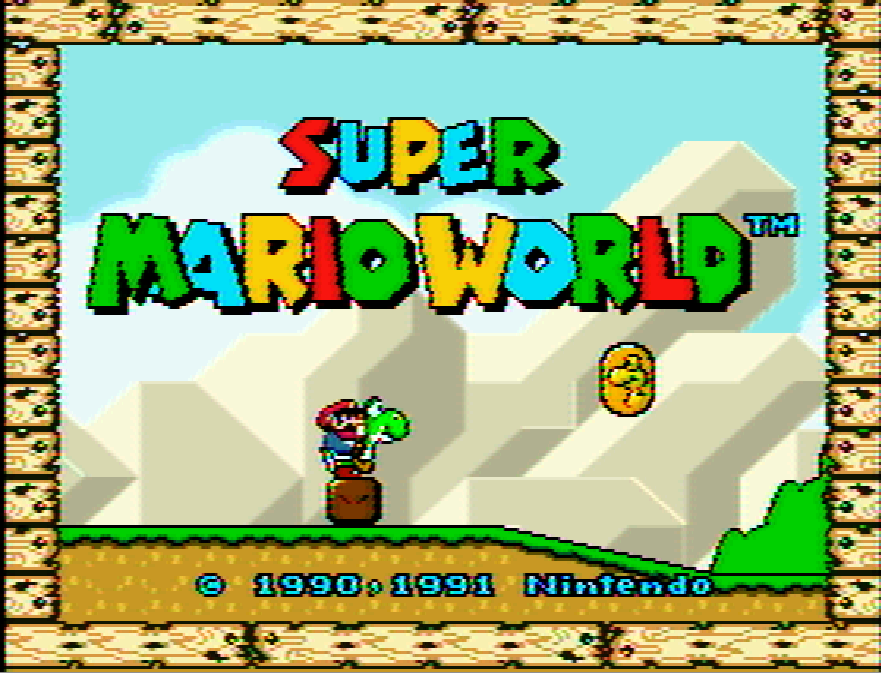
First, we should look at the baseline. This was scaled up to size using nearest-neighbor and is otherwise untouched:
Next, we'll add blargg's NTSC filter, which emulates the noise and color bleed of an NTSC video signal (this filter has several presets; I will only be showing the RGB preset, which reproduces the look of an SNES hooked up via RGB connection [not available in the U.S.], and the RF preset, which reproduces the look of the SNES RF modulator attachment, respectively):
(<- Look at that noisy RF signal!)
As a note, blargg's NTSC filter is so accurate that byuu, the author of bsnes, recommends its use along with bsnes' accuracy profile to achieve proper blending on games that use halftones to simulate transparency (Jurassic Park and Kirby's Dreamland, for example).

Next up, we'll look at cgwg's CRT shader, which includes a phosphor mask and barrel distortion to simulate the screen curvature of a CRT television (just look at those RGB phophors!):
Similarly, there is a version of cgwg's CRT shader, which doesn't include the barrel distortion and represents an idealized flat CRT (actual flat CRTs tended to have slight blurring at the edges where the tube curvature would normally be). Incidentally, this version also has no visible garbage pixels (the occasional black specs that are visible in the curved version):

Pixel Shaders vs. Software Filters

cgwg's CRT shader is a special kind of filter known as a pixel shader. Unlike regular filters, which rely on the CPU to do all of the complex upscaling calculations, pixel shaders draw on the awesome computing power of the video card to do the calculations, thereby leaving the CPU to focus on emulating the SNES. Additionally, since the pixel shader is calculated separately from the filter in bsnes, you can stack blargg's NTSC filter with cgwg's CRT shader:
Finally, for non-purists, we'll look at the combination of cgwg's CRT shader with the popular SuperSaI filter, which creates a pleasing--though not quite as accurate--output:
As amazing as cgwg's CRT shader is already, there is still some room for improvement. For example, the current implementation misses the intensity-based bloom effect on individual phosphors that can be seen in a true CRT. DOLLS (J) [!], one of the contributors to the CRT reproduction effort, intends to write a more complete CRT emulation shader in the future that will incorporate these and other idiosyncracies.

Click here to download cgwg's CRT shader (Also includes the 'flat' version for those who don't like the tube-style curvature; UPDATE: fixed dead link), which is compatible with bsnes and the newest release of snes9x. For more information on CRT emulation, you can check out this highly informative thread on the bsnes forum. For other bsnes-compatible shaders that are not included with the official download, check out my mediafire account.

UPDATE (3/4/2011): Themaister did a rewrite of the flat version of cgwg's CRT shader, moving many of the calculations from fragment to vertex, which provides a substantial ~20% increase in speed (making it usable on many older and less powerful video cards). This rewrite also appears to conform more rigidly to the GLSL shader spec, making it compatible with more cards from different vendors. I have labeled it v4 of cgwg's CRT Flat, and it is available in the aforemented mediafire account.

الجمعة، 24 ديسمبر 2010

bsnes Phoenix GUI Filter Changes

Byuu has added support for binary filters in his Phoenix GUI as of v073, so we can finally use cgwg's CRT Curved shader in conjunction with blargg's NTSC filter! These binary filters are loaded just like shaders, i.e., via a dialog box in the video options.

You can download the available filters, compiled for 64-bit Linux, here or compiled for 32-bit here. These filters do not appear to work on Windows systems.